- Juanma's Blog/
- Posts/
- Deploying OpenStack with KVM and VMware NSX - Part 4: Deploy OpenStack RDO with Neutron integrated with NSX/
Deploying OpenStack with KVM and VMware NSX - Part 4: Deploy OpenStack RDO with Neutron integrated with NSX
Table of Contents
Welcome to Part 4 for this series about OpenStack and VMware NSX. To do a quick review, in the first three parts we described the different VMware NSX components and concepts and how to install and configure them, also discussed how to install and configure the KVM and GlusterFS nodes. In this fourth part of the series we will see how to deploy OpenStack in a three-node architecture and integrate it with our existent NSX installation.
If you remember the first post where I described the components of the lab, there were three OpenStack dedicated nodes:
- Cloud controller node
- Neutron networking node
- Nova compute node
Instead of installing from scratch I decided to go with one of the OpenStack distributions: RDO. What is RDO and why I decided for it? RDO is a community distribution of OpenStack sponsored by Red Hat, yes I just say Red Hat so please stop the eye rolling.
RDO is the upstream version of RHEL OpenStack Platform, the commercial version of OpenStack by Red Hat. During the last months I tried several flavors of OpenStack and while I still think that installing from scratch is the best way to learn, in fact is what I did for my first labs, RDO gives me the possibility to quickly create my testing labs. Also RHEL OP Version 4, based on RDO, is supported with VMware NSX and I really couldn’t resist myself to try it.
Installation prerequisites #
Before proceeding with the installation there are some preparations weneed to perform on the OpenStack nodes.
SSH key generation #
Generate a new SSH key to be later distributed on the OpenStack nodes during the installation. Use ssh-keygen to generate the new key.
Neutron server preparation #
In the Neutron node install NSX Open vSwitch version as described in Part 3 for the KVM nodes, the network interface configuration it’s quite similar.
With the network interface configuration files properly setup exist your SSH session and log into the VM console to create the OVS bridges like the example below.
ovs-vsctl add-br br-ex
ovs-vsctl br-set-external-id br-ex bridge-id br-ex
ovs-vsctl set Bridge br-ex fail-mode=standalone
ovs-vsctl add-port br-ex eth0
OpenStack installation #
RDO relies on packstack for the installation of its different components. Packstack is a tool that will install all required software in the nodes based on an answer file. Enable RDO and EPEL repos and install openstack-packstack package.
yum install -y http://download.fedoraproject.org/pub/epel/6/x86_64/epel-release-6-8.noarch.rpm
yum install -y http://repos.fedorapeople.org/repos/openstack/openstack-havana/rdo-release-havana-8.noarch.rpm
yum install -y openstack-packstack
Once it is installed generate a new answer file, we will use this file as a template for our installation.
packstack --gen-answer-file rdo_answers.txt
Edit packstack answer file and modify the following entries, leave the rest with the default values. It is important to do not eliminate any entry or packstack execution will fail.
Deactivate services we do not want to deploy.
CONFIG_SWIFT_INSTALL=n
CONFIG_CEILOMETER_INSTALL=n
CONFIG_NAGIOS_INSTALL=n
CONFIG_CINDER_INSTALL=n
Nova settings.
CONFIG_NOVA_COMPUTE_HOSTS=192.168.82.42
CONFIG_NOVA_NETWORK_HOSTS=
And finally Neutron settings. Don’t set any L3 value since that part will be managed by NSX.
CONFIG_NEUTRON_SERVER_HOST=192.168.82.41
CONFIG_NEUTRON_DHCP_HOSTS=192.168.82.41
CONFIG_NEUTRON_METADATA_HOSTS=192.168.82.41
Launch OpenStack installation process.
packstack --answer-file rdo_answers.txt
The installation will take a while so you better grab a cup of coffee and have a look at the output while the software installs on each of the three nodes. If everything goes as expected we should see a similar message at the of the installation process.
 **** Installation completed successfully ******

Additional information:
 * Time synchronization installation was skipped. Please note that unsynchronized time on server instances might be problem for some OpenStack components.
 * File /root/keystonerc_admin has been created on OpenStack client host 192.168.82.40. To use the command line tools you need to source the file.
 * To access the OpenStack Dashboard browse to http://192.168.82.40/dashboard.
Please, find your login credentials stored in the keystonerc_admin in your home directory.
 * Because of the kernel update the host 192.168.82.42 requires reboot.
 * Because of the kernel update the host 192.168.82.40 requires reboot.
 * Because of the kernel update the host 192.168.82.41 requires reboot.
 * The installation log file is available at: /var/tmp/packstack/20140617-001835-On5TCi/openstack-setup.log
 * The generated manifests are available at: /var/tmp/packstack/20140617-001835-On5TCi/manifests
[root@cloud-controller ~]#
Reboot the three nodes as instructed and proceed to the next step.
Configure Glance to use GlusterFS #
RDO packstack cannot configure Glance to use GlusterFS as its storage backend during the installation and it has to be configured afterwards. Fortunately the necessary steps are documented on RDO site.
Stop Glance services.
service openstack-glance-registry stop
service openstack-glance-api stop
Install gluster required packages on the controller node.
yum install glusterfs-fuse glusterfs
Mount GlusterFS share and set the ownership and permissions for glance user.
mount -t glusterfs gluster.vlab.local:gv0 /var/lib/glance/images
chown -R glance:glance /var/lib/glance/images
Start Glance services.
service openstack-glance-registry start
service openstack-glance-api start
With the installation finished OpenStack Horizon dashboard should be available at http://cloud_controller_fqdn/dashboard. Log in with the user admin, the password for this user can be found in the file /root/keystonerc_admin on the cloud controller node.
[root@cloud-controller ~]# cat keystonerc_admin
export OS_USERNAME=admin
export OS_TENANT_NAME=admin
export OS_PASSWORD=cd0ed5b5f251450f
export OS_AUTH_URL=http://192.168.82.40:35357/v2.0/
export PS1='[\u@\h \W(keystone_admin)]\$ '
[root@cloud-controller ~]#
If login fails with an unexpected error check that firewall is deactivated in all three nodes and that all services are up and running, in some of my deployments Neutron server did not start after a reboot and I had to start it manually.
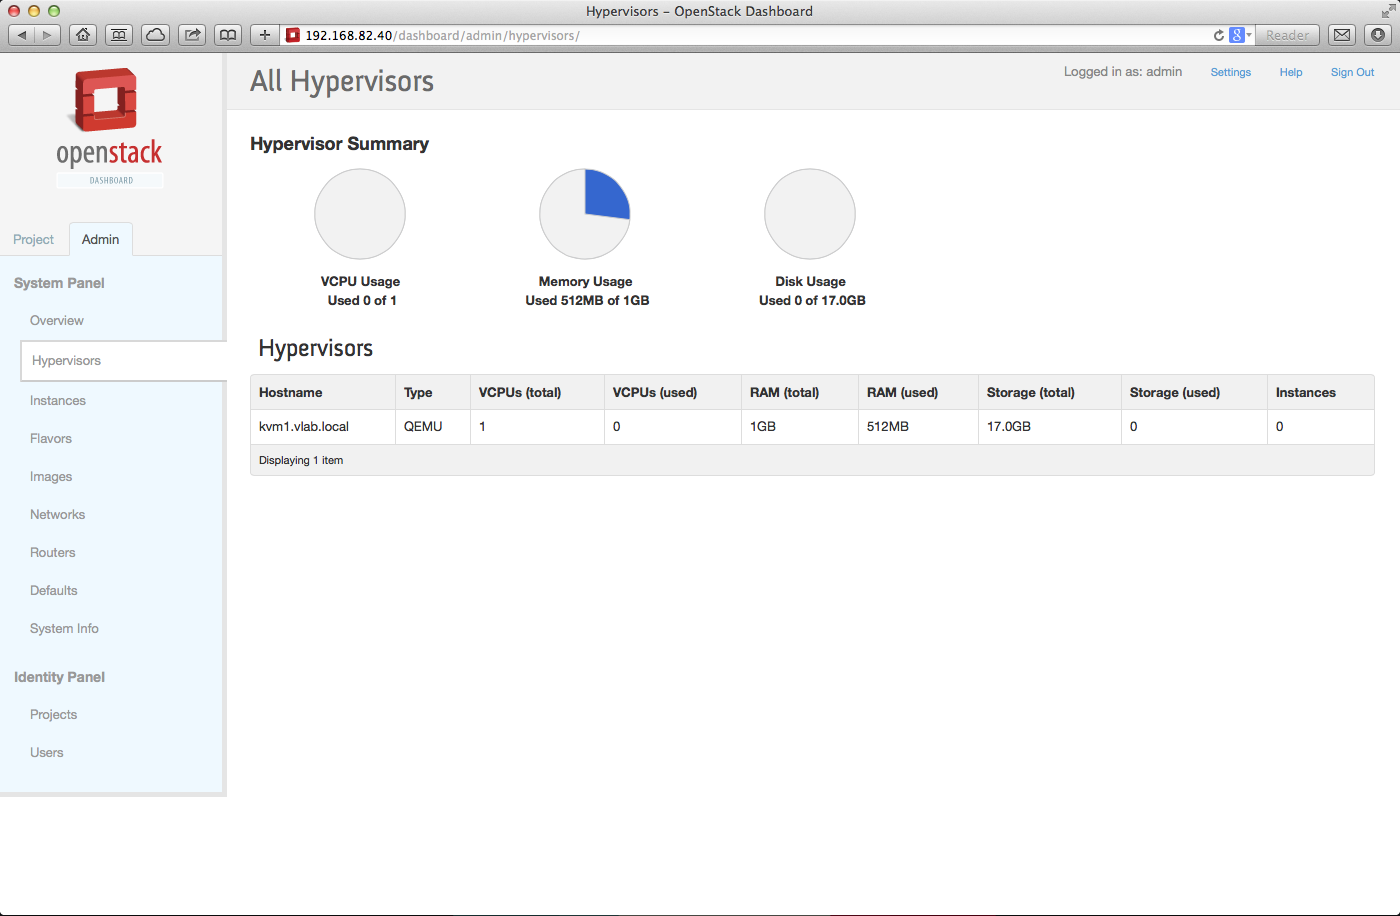
Once logged into horizon navigate to Admin -> Hypervisor and check that the KVM hypervisor is properly registered.
Configure the NSX integration #
At this point we have a working OpenStack installation with Neutron using the Open vSwitch plugin, now we will proceed to integrate our shiny OpenStack cloud with NSX.
Install NSX Neutron plugin #
VMware provides a set of RPM packages containing the NSX plugin and a VMware sanctioned version of Neutron, however I found that this packages were older than my Havana installation and didn’t want to brake any dependencies and spend hours trying to fix my installation.
A tar file containing all the source for both the plugin and Neutron itself is also available and instructions on how to compile and install it are provided in NSX documentation, during my first trials I took this path but this time I decided to use the upstream plugin instead since it was available in RDO repositories.
yum install openstack-neutron-nicira
Configure NSX plugin #
Register the Neutron server as a transport node on the NSX Controller Cluster.
ovs-vsctl set-manager ssl:192.168.82.45
Stop neutron services.
service neutron-server stop
Edit /etc/neutron/neutron.conf file and set core_plugin value to neutron.plugins.nicira.NeutronPlugin.NvpPluginV2.
Configure nvp.ini file accordingly, this file can be found in /etc/neutron/plugins/nicira.
Set NSX admin user and password.
nvp_user = admin
nvp_password = admin
Configure NSX controllers IP addresses.
nvp_controllers = 192.168.82.45
Set the default Transport Zone UUID and the L3 and L2 gateway services UUID, these values can be retrieved from the NSX Manager web.
default_tz_uuid = b948fd35-5737-4a30-8741-43134771d40c
default_l3_gw_service_uuid = adee048c-3776-4bd2-ade1-42ab5c90bf9e
Configure metadata for Nova instances, set metadata_dhcp_host_route to False in [DEFAULT] section. In [nvp] section set the metadata mode as access_network.
enable_metadata_access_network = True
metadata_mode = access_network
Create a [database] section and configure the connection to Neutron MySQL database, the data can be found on neutron.conf file.
[database]
connection = mysql://neutron:ac2191a8661b4b66@192.168.82.40/ovs_neutron
Finally before start Neutron services check nvp.ini with the command neutron-check-nvp-config. You should get something like this.
[root@neutron ~]# neutron-check-nvp-config /etc/neutron/plugins/nicira/nvp.ini
----------------------- Database Options -----------------------
        connection: mysql://neutron:ac2191a8661b4b66@192.168.82.40/ovs_neutron
        retry_interval: 10
        max_retries: 10
-----------------------    NVP Options   -----------------------
        NVP Generation Timeout -1
        Number of concurrent connections to each controller 10
        max_lp_per_bridged_ls: 5000
        max_lp_per_overlay_ls: 256
-----------------------  Cluster Options -----------------------
        requested_timeout: 30
        retries: 2
        redirects: 2
        http_timeout: 10
Number of controllers found: 1
        Controller endpoint: 192.168.82.45:443
                Gateway(L3GatewayServiceConfig) uuid: adee048c-3776-4bd2-ade1-42ab5c90bf9e
        Transport zones: [u'b948fd35-5737-4a30-8741-43134771d40c']
Done.
[root@neutron ~]#
Start Neutron services
service neutron-server start
Create a network neutron command line to test that everything is working as expected.
[root@cloud-controller ~(keystone_admin)]# neutron net-create nsx-test-net
Created a new network:
+-----------------------+--------------------------------------+
| Field                 | Value                                |
+-----------------------+--------------------------------------+
| admin_state_up        | True                                 |
| id                    | 24f3b23f-a938-40e7-b026-14c8fb77ff34 |
| name                  | nsx-test-net                         |
| port_security_enabled | True                                 |
| shared                | False                                |
| status                | ACTIVE                               |
| subnets               |                                      |
| tenant_id             | 4d9fbabd4c9d4fa4a2185ff7559ae4e8     |
+-----------------------+--------------------------------------+
[root@cloud-controller ~(keystone_admin)]#
[root@cloud-controller ~(keystone_admin)]# neutron net-list
+--------------------------------------+--------------+---------+
| id                                   | name         | subnets |
+--------------------------------------+--------------+---------+
| 24f3b23f-a938-40e7-b026-14c8fb77ff34 | nsx-test-net |         |
+--------------------------------------+--------------+---------+
[root@cloud-controller ~(keystone_admin)]#
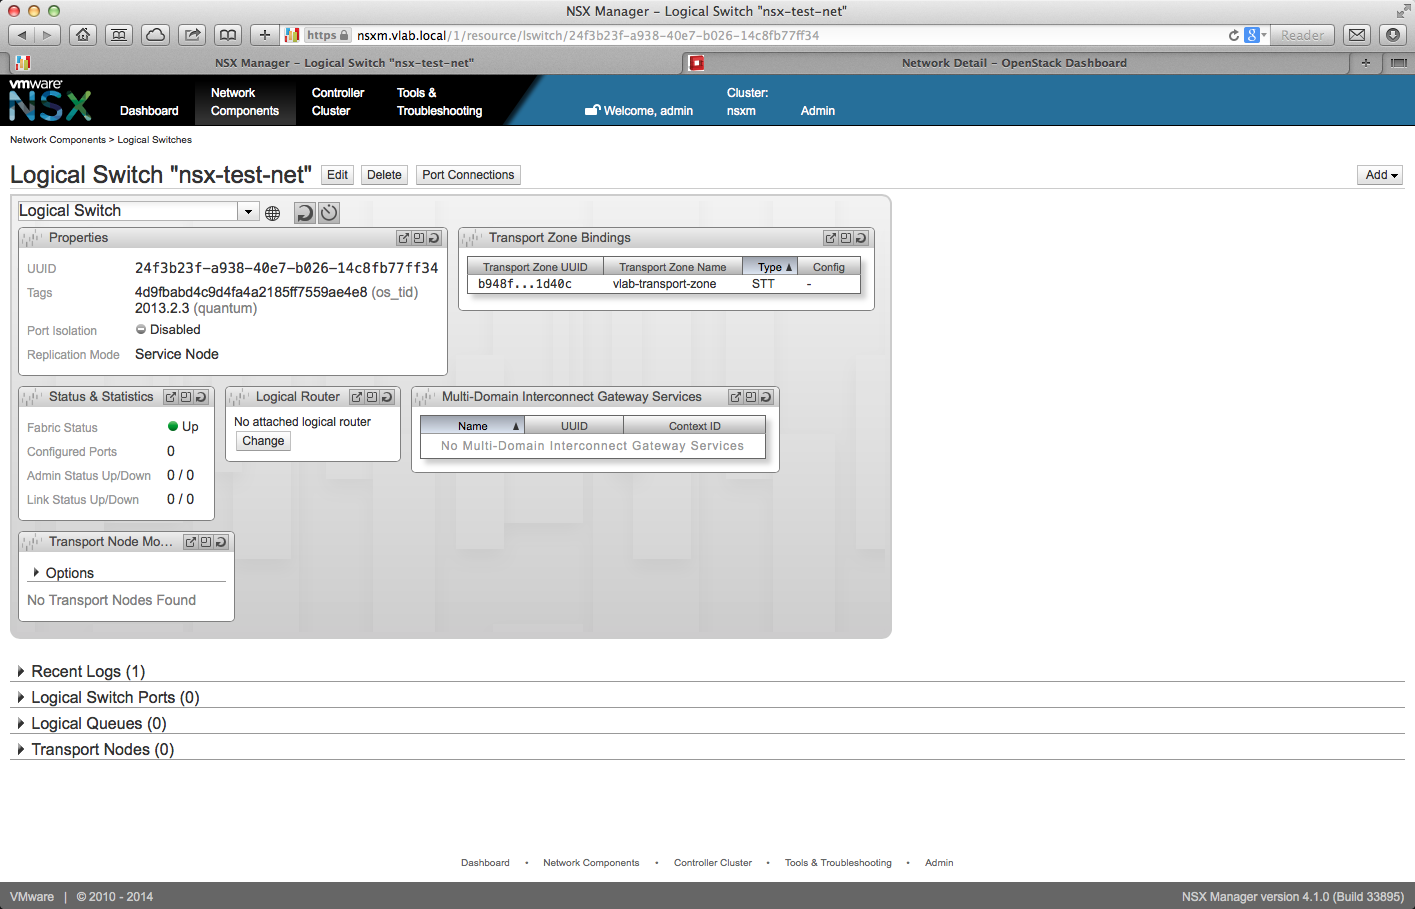
Access NSX Manager web interface, navigate to Logical Switches and confirm that a new logical switch with the same name and UUID as the new OpenStack network has been created.
Congratulations! We have successfully deployed a distributed installation of OpenStack with KVM as the underlying hypervisor and integrated with VMware NSX state of the art network virtualization software. In future posts out of this four article series we will discuss some tips and other parts of OpenStack and NSX. Courteous comments are welcome.
Juanma.