How to setup ESXi for NSX
Table of Contents
In the series of posts about OpenStack and KVM we saw how to add a KVM node to NSX for multi-hypervisor environments as a transport node. In this post we will discuss how to perform the same procedure for an ESXi host.
NSX vSwitch installation #
Before proceeding with the installation keep in mind that NSX vSwitch can run on an ESXi host simultaneously only with VMware Standard Switch, distributed switches are not supported.
Install the NSX vSwitch vib file using esxcli.
~ # esxcli software vib install --no-sig-check -v /tmp/vmware-nsxvswitch-2.1.3-35984-prod2013-stage-release.vib
Installation Result
   Message: Operation finished successfully.
   Reboot Required: false
   VIBs Installed: VMware_bootbank_vmware-nsxvswitch_2.1.3-35984
   VIBs Removed:
   VIBs Skipped:
~ #
~ # esxcli software vib list | grep nsx
vmware-nsxvswitch              2.1.3-35984                           VMware  VMwareCertified   2014-07-13
~ #
Check that the a new virtual switch has been created on the host, don’t use esxcli but the good old esxcfg-vswitch command because for now there is no namespace available in esxcli for NSX vSwitch.
~ # esxcfg-vswitch -l
Switch Name      Num Ports   Used Ports  Configured Ports  MTU     Uplinks
vSwitch0         1536        7           128               1500    vmnic0,vmnic1

  PortGroup Name        VLAN ID  Used Ports  Uplinks
  vMotion               0        1           vmnic0,vmnic1
  Management Network    0        1           vmnic0,vmnic1

Switch Name      Num Ports   Used Ports  Configured Ports  MTU     Uplinks
vSwitch1         1536        6           128               1500    vmnic2,vmnic3

  PortGroup Name        VLAN ID  Used Ports  Uplinks
  vsan                  0        1           vmnic2,vmnic3

Switch Name      Num Ports   Used Ports  Uplinks
nsx-vswitch      1536        1

~ #
NSX vSwitch configuration #
With NSX vSwitch installed proceed to the configuration. First connect an uplink to the switch, this will create an NVS bridge which is the equivalent of an OVS bridge in Open vSwitch.
nsxcli uplink/connect vmnic4
Set an IP address for the uplink, this IP address will be used later to create the transport tunneling endpoint when we connect the ESXi as a transport node to NSX. You can also specify the VLAN tag by appending vlan=<vlan_id> as an additional parameter to the command.
nsxcli uplink/set-ip vmnic4 192.168.110.123 255.255.255.0
Validate that the bridge is correctly configured. Use nsxcli port/show to verify the bridge and nsxcli uplink/show for the uplink.
~ # nsxcli port/show
br-int:
-------

br-vmnic4:
----------
vmnic4
vmk3

~ #
In the uplink/show output look for an entry like the one below.
==============================
vmnic4:
MAC       : 00:50:56:01:08:ca
Link      : Up
MTU       : 1500
IP config :
------------------------------
VMK intf  : vmk3
MAC addr  : 00:50:56:6b:ca:dd
Services  : NSX-Tunneling
VLAN      : 0
IP        : 192.168.110.123(Static)
Mask      : 255.255.255.0(Static)
..............................
------------------------------
Connection : NVS (uplink0)
Configured as standalone interface
==============================
You can also check the status of the vmkernel interface with esxcli and with nsxcli.
 ~ # esxcli network ip interface ipv4 get -i vmk3
Name  IPv4 Address     IPv4 Netmask   IPv4 Broadcast   Address Type  DHCP DNS
----  ---------------  -------------  ---------------  ------------  --------
vmk3  192.168.110.123  255.255.255.0  192.168.110.255  STATIC           false
~ #
~ # nsxcli vmknic/show vmk3
vmk3:
MAC addr  : 00:50:56:6b:ca:dd
Services  : NSX-Tunneling
VLAN      : 0
IP        : 192.168.110.123(Static)
Mask      : 255.255.255.0(Static)
Assoc with: vmnic4
..............................
~ #
The next step is configure the gateway for NSX vSwitch.
~ # nsxcli gw/set tunneling 192.168.110.2
~ #
~ # nsxcli gw/show tunneling
Tunneling:
Configured default gateway       : 192.168.110.2
Currently active default gateway : 192.168.110.2 (Manual)
~ #
Connect NSX vSwitch instance to NSX controller cluster.
~ # nsxcli manager/set ssl:192.168.110.31
~ #
~ # nsx-dbctl show
e42912a7-693f-43ee-84d5-11b5bb3491eb
    Manager "ssl:192.168.110.31:6632"
    Bridge br-int
        fail_mode: secure
    Bridge "br-vmnic4"
        fail_mode: standalone
        Port "vmk3"
            Interface "vmk3"
        Port "vmnic4"
            Interface "vmnic4"
    ovs_version: "2.1.3.35984"
~ #
Create an opaque network. An opaque network is basically a transport bridge that will provide the network backend for the virtual machines. Opaque networks must be identified during its creation based on its type and ID.
In this particular case the ESXi will be added later to a cluster acting as nova compute backend for my OpenStack lab so the network type must be nsx.network and the UUID have to match the configured one for the integration_bridge setting in nova.conf file. We also need to specify the port attach mode, for OpenStack environments is manual.
~ # nsxcli network/add NSX-Bridge NSX-Bridge nsx.network manual
success
~ #
~ # nsxcli network/show
UUID                                        Name                    Type            Mode
----                                        ----                    ----            ----
NSX-Bridge                                  NSX-Bridge              nsx.network     manual
~ #
Add ESXi as transport node #
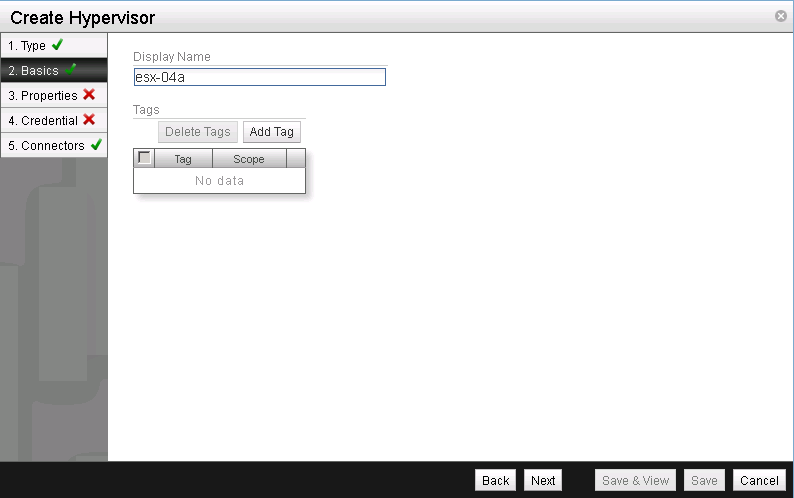
The final part of the procedure is to add our new ESXi server as transport node to NSX. Log into NSX Manager web UI and initiate the wizard to add a new Hypervisor. First specify the name of the new hypervisor.
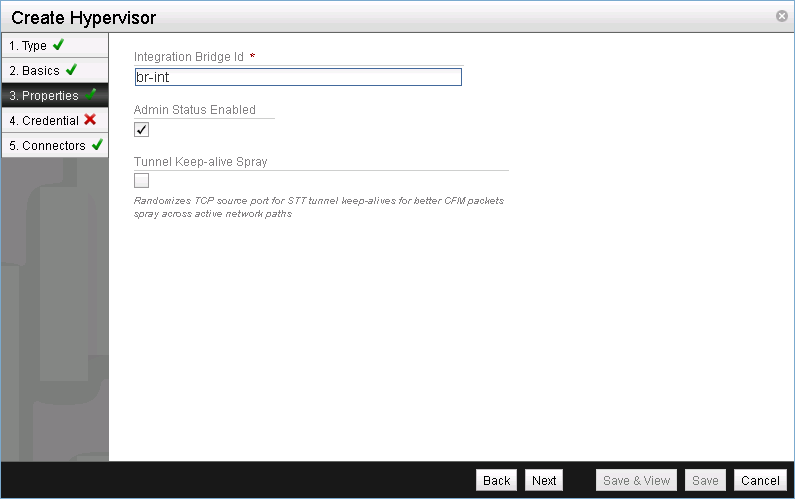
Set the integration bridge.
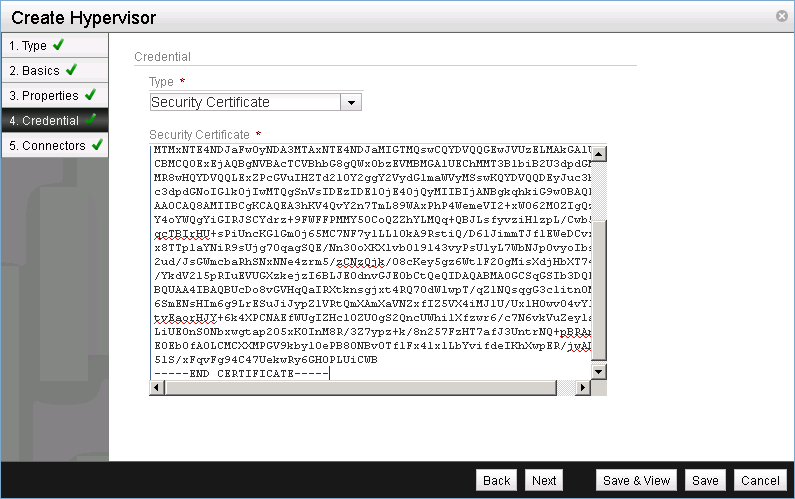
Select Security Certificate as credential type and paste the NSX vSwitch SSL certificate. The certificate can be retrieved from /etc/nsxvswitch/nsxvswitch-cert.pem.
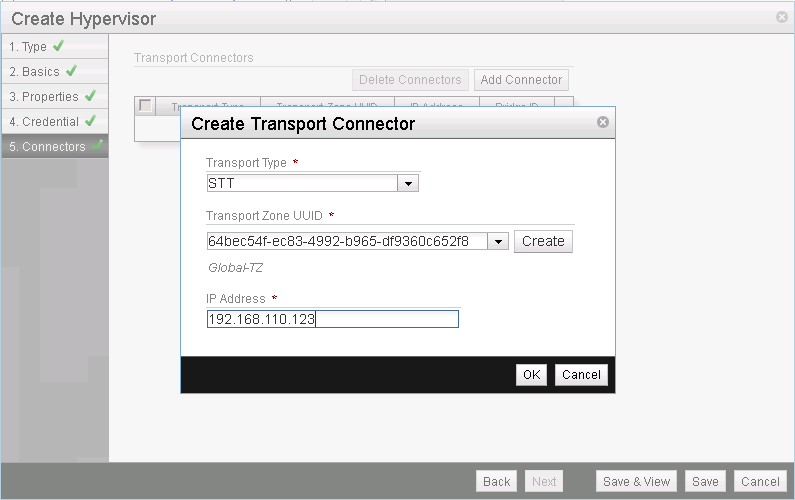
Add an SST transport connector, using the IP address configured for the uplink.
Click Save & View and verify the new hypervisor configuration in NSX.
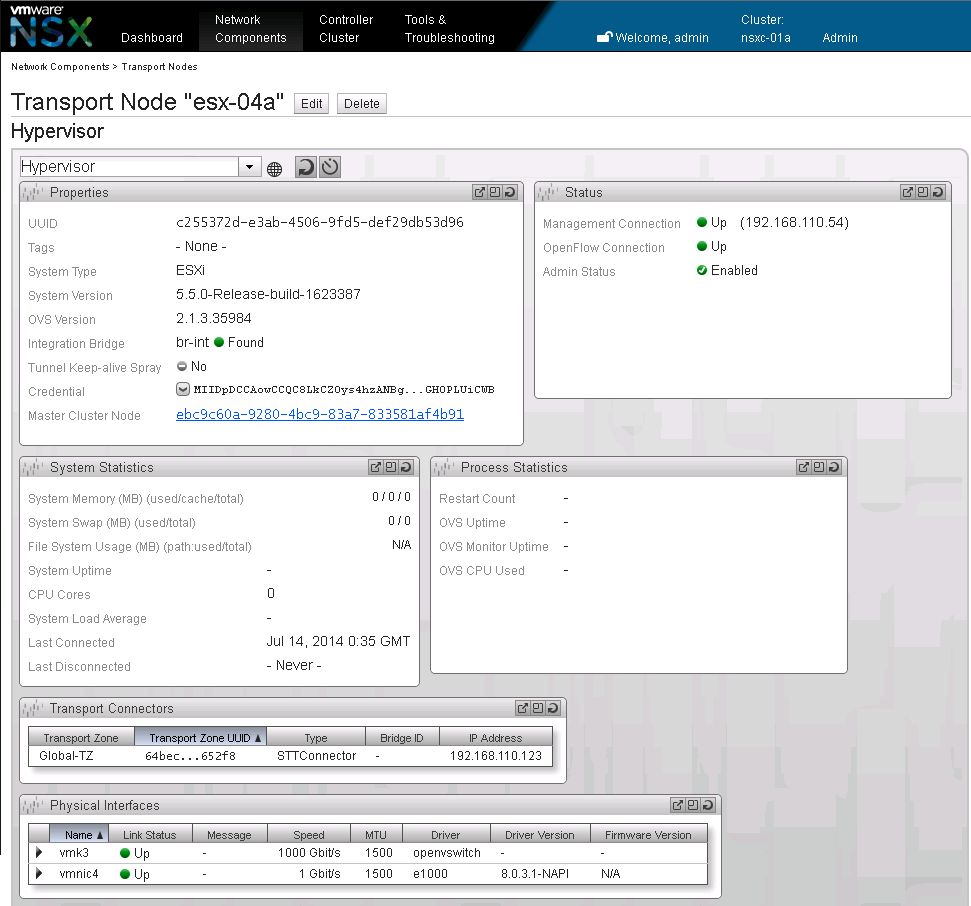
The setup of our new ESXi server within NSX is done. As always comments are welcomed.
Juanma.