Configure NFS shares in Openfiler for your vSphere homelab
Table of Contents
Even if you have access to the enterprise-class storage appliances, like the HP P4000 VSA or the EMC Celerra VSA, an Openfiler storage appliance can be a great asset to your homelab. Specially if you, like myself, run an all virtual homelab within VMware Workstation, since Openfiler is by far less resource hunger than its enterprise counterparts.
Simon Seagrave (@Kiwi_Si) from TechHead.co.uk wrote an excellent article explaining how to add iSCSI LUNs from an Openfiler instance to your ESX/ESXi servers, if iSCSI is your “thing” you should check it.
In this article I’ll explain how-to configure a NFS share in Openfiler and then add it as a datastore to your vSphere servers. I’ll take for granted that you already have an Openfiler server up and running.
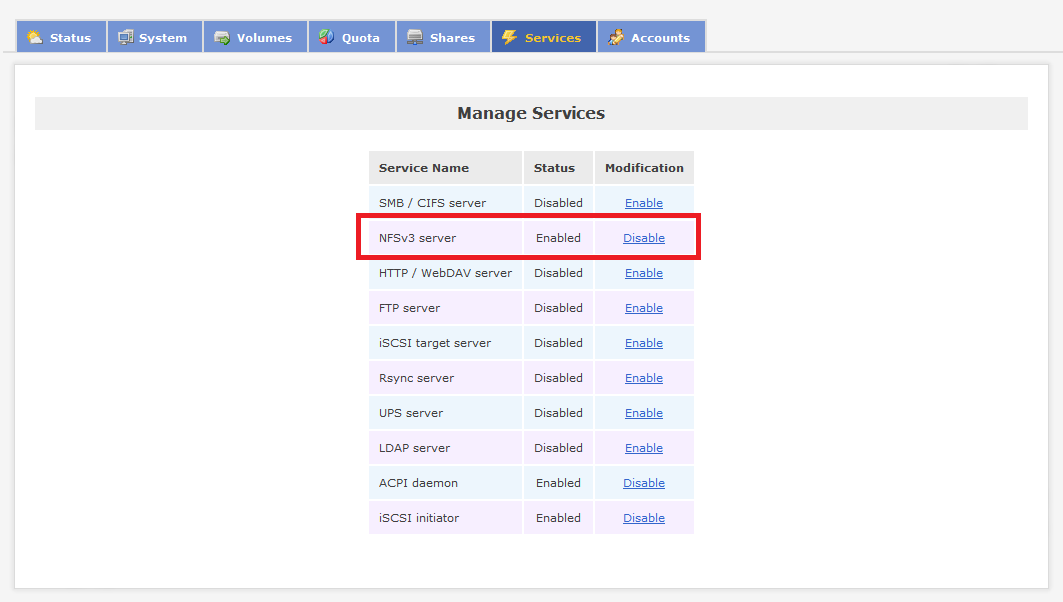
Step 1 - Enable NFS service #
As always point your browser to https://<openfiler_address>:446, login and from the main screen go to the Services tab and enable the NFSv3 service as shown below.
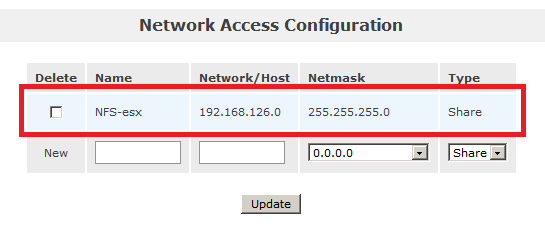
Step 2 - Setup network access #
From the System tab add the network of the ESX servers as authorized. I added the whole network segment but you can also create network access rules per host in order to setup a more secure and granular access policy.
Step 3 - Create the volumes #
The next step is to create the volumes we are going to use as the base for the NFS shares. If like me you’re a Unix/Linux Geek it is for sure that you understand perfectly the PV -> VG -> LV** concepts if not I strongly recommend you to check the TechHead article mentioned above where Simon explained it very well or if you want to go a little deeper with volumes in Unix/Linux my article about volume and filesystem basics in Linux and HP-UX.
First we need to create the physical volumes; go to the Volumes tab, enter the Block Devices section and edit the disk to be used for the volumes.
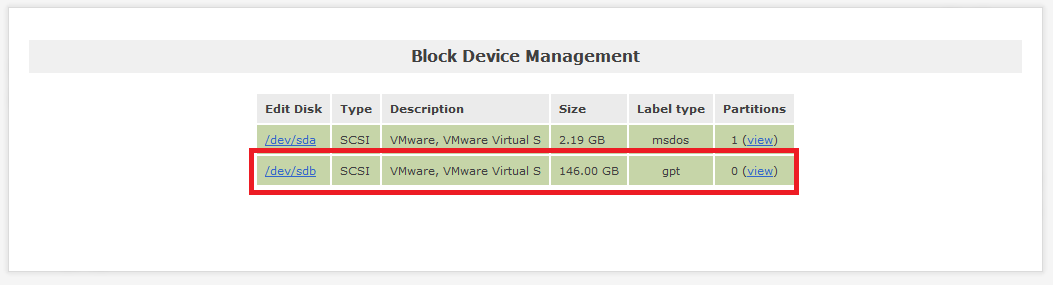
Create a partition and set the type to Physical Volume.

Once the Physical Volume is created go to the Volume Groups section and create a new VG and use for it the new PV.

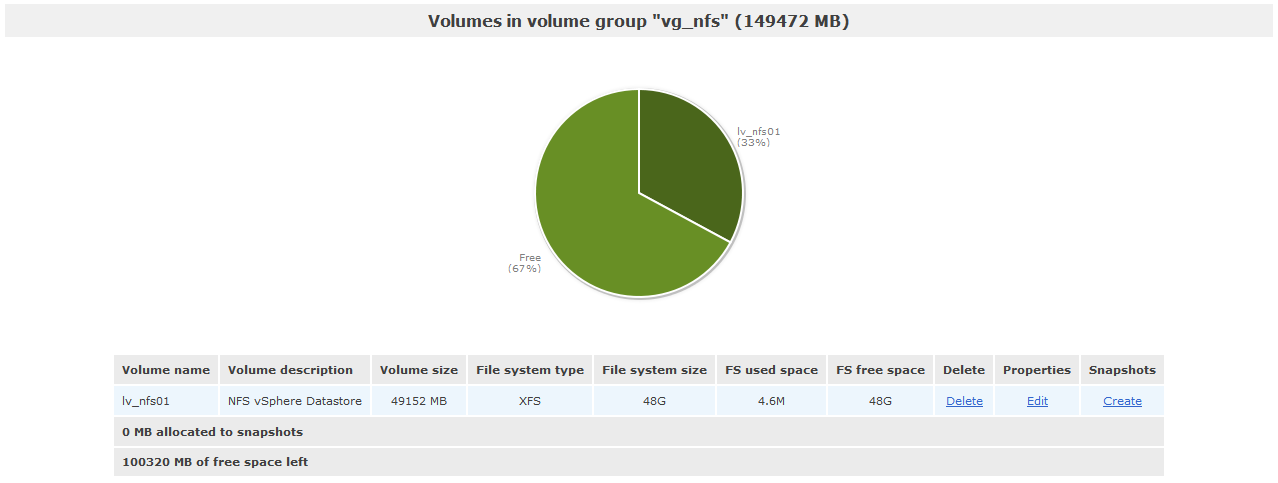
Finally click on Add Volume. In this section you will have to choose the new VG that will contain the new volume, the size, name description and more important the Filesystem/Volume Type. There are three type:
- iSCSI
- XFS
- Ext3
The first is obviously intended for iSCSI volume and the other two for NFS, the criteria to follow here is the scalability since ext3 supports up to 8TB and XFS up to 10TB.
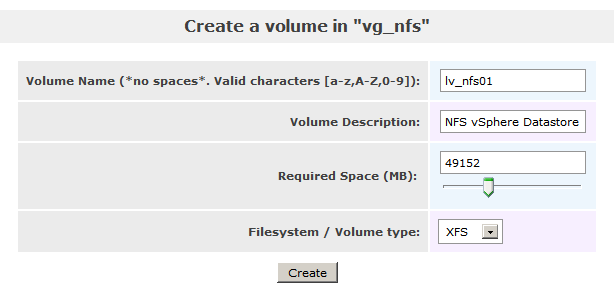
Click Create and the new volume will be created.
Step 4 - Create the NFS share #
Go to the Shares tab, there you will find the new volume as an available share.

Just to clarify concepts, this volume IS NOT the real NFS share. We are going to create a folder into the volume and share that folder through NFS to our ESX/ESXi servers.
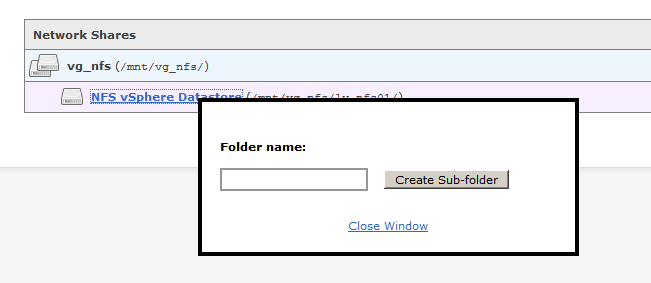
Click into the volume name and in the pop-up enter the name of the folder and click Create folder.
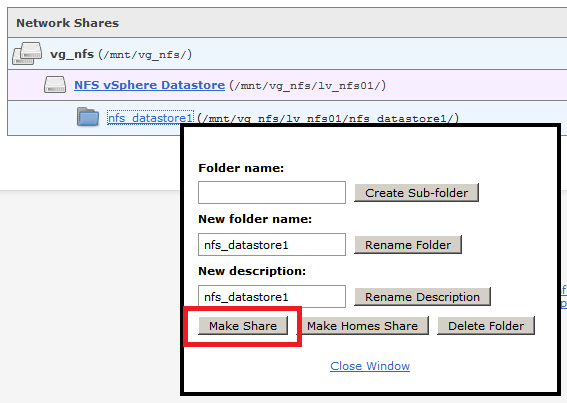
Select the folder and in the pop-up click the Make Share button.
Finally we are going to configure the newly created share; select the share to enter its configuration area.
Edit the share data to your suit and select the Access Control Mode. Two modes are available:
- Public guest access - There is no user based authentication.
- Controlled access - The authentication is defined in the Accounts section.
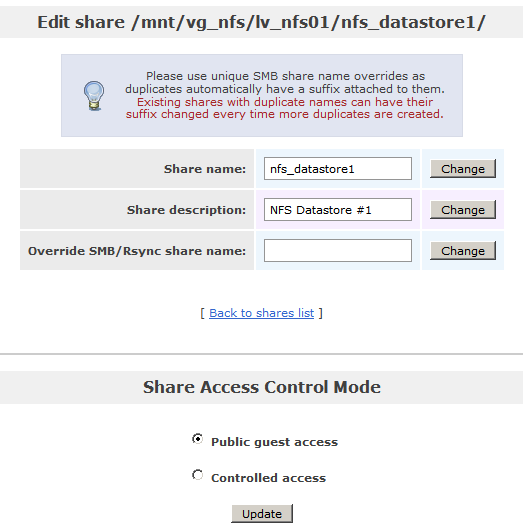
Since this is only for my homelab I choose Public access.
Next select the share type, for our purposes case I obviously choose NFS and set the permissions as Read-Write.
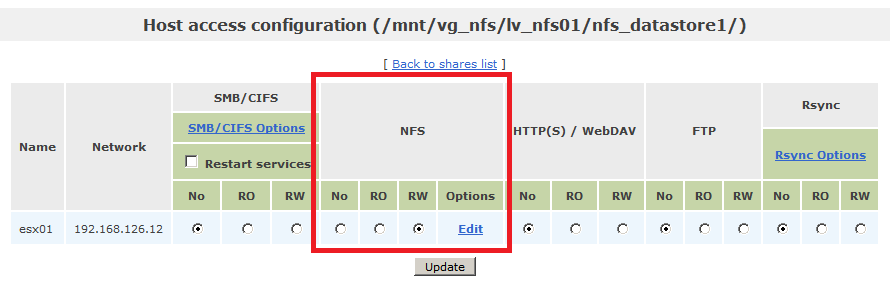
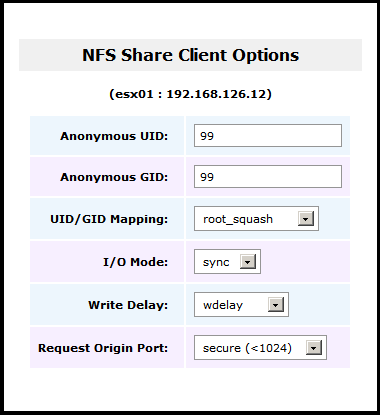
You can also edit the NFS options and configure to suit your personal preferences and/or specifications.
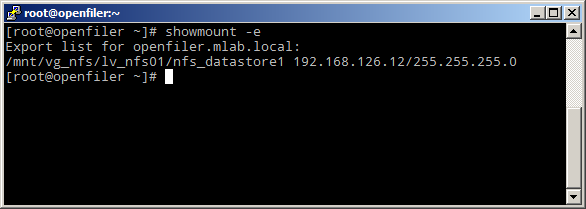
Just a final tip for the non-Unix people, if you want to check the NFS share open a SSH session with Openfiler server and as root issue the command showmount -e. The output should look like this.
The Openfiler configuration is done, now we are going to create a new datastore in our ESX servers.
Step 5 - Add the datastore to the ESX servers #
Now that the share is created and configured it is time to add it to our ESX servers.
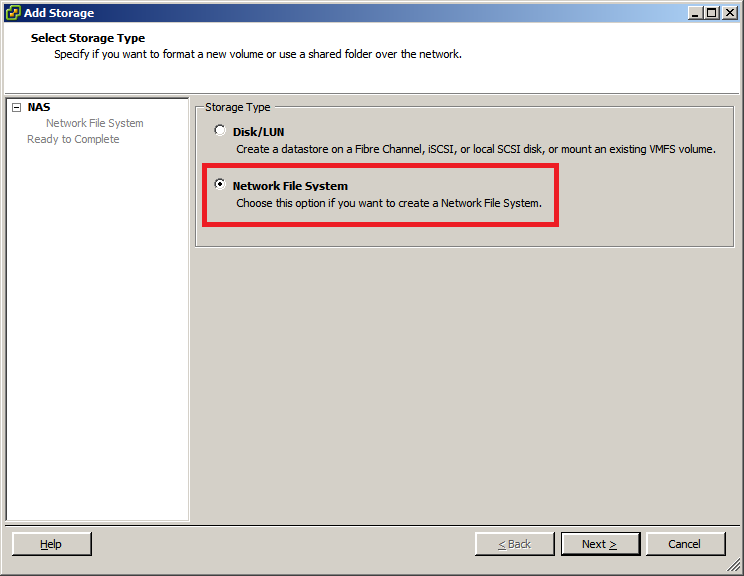
As usually from the vSphere Client go to Configuration -> Storage -> Add storage.
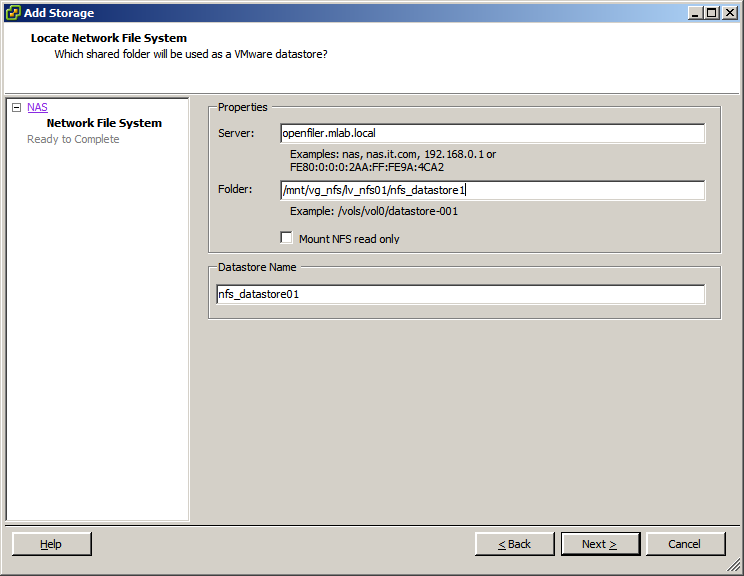
In the pop-up window choose Network File System.
Enter in the Server, Folder and Datastore Name label.
Finally check the data and click finish. If everything goes well after a few seconds the new datastore should appear.
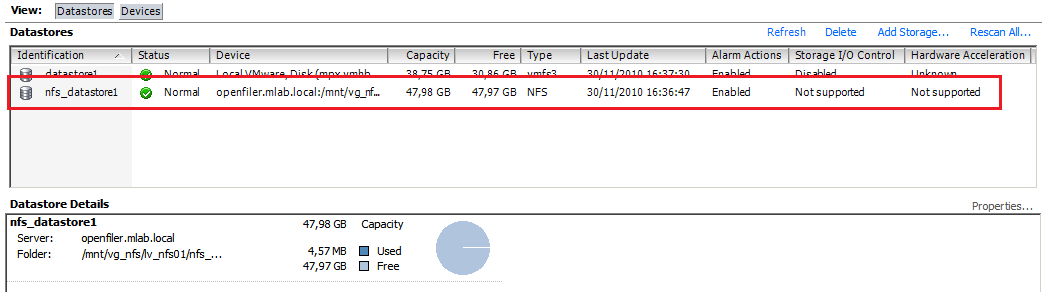
And with this we are finished. If you see any mistake or have anything to add please comment.
Juanma.