OpenShift Container Platform integration with Azure Active Directory
Table of Contents
After my previous post about AAD integration with Kubernetes 1.8 I decided it would be interesting as well to write about the process to integrate OpenShift with Azure Active Directory.
Although OpenShift V3 uses Kubernetes as its core, for the authentication of the users it does not make use of RBAC; this is because when OpenShift V3 was released Kubernetes lacked that capability and the engineers at Red Hat had to implement an authentication method and security method. The authentication mechanism is part of what OpenShift provides on top of Kubernetes,among with the portal, network isolation and other features, and is in my opinion one of the most compelling parts of OpenShift.
Azure AD App Registration #
Before configuring OpenShift with the Azure Active Directory authentication backend first we will need to create an AAD App Registration with the corresponding permissions. To create the app we user two different methods, Azure CLI and the Azure Portal.
For both cases we will need to have the different parameters prepared in advance:
- Display Name: The name for your app.
- Password: A strong password to comply with AAD password requirements.
- Home page: The OpenShift Console URL.
- Identifier URL: The OpenShift Console URL.
- Reply URL: This URL has to be constructed in the following format:
https://<OPENSHIFT_MASTER_PUBLIC_URL>/oauth2callback/<APP_DISPLAY)NAME>
App creation with Azure CLI #
You can create the Azure App Registration with just one command.
az ad app create --display-name OpenShiftAAD --homepage https://masterdnswdrnk7iozqvo2.westeurope.cloudapp.azure.com:8443/console --reply-urls https://masterdnswdrnk7iozqvo2.westeurope.cloudapp.azure.com:8443/oauth2callback/OpenShiftAAD --identifier-uris https://masterdnswdrnk7iozqvo2.westeurope.cloudapp.azure.com:8443/console --password <YOU_SUPER_AWESOME_PASSWORD>
App creation with Azure Portal #
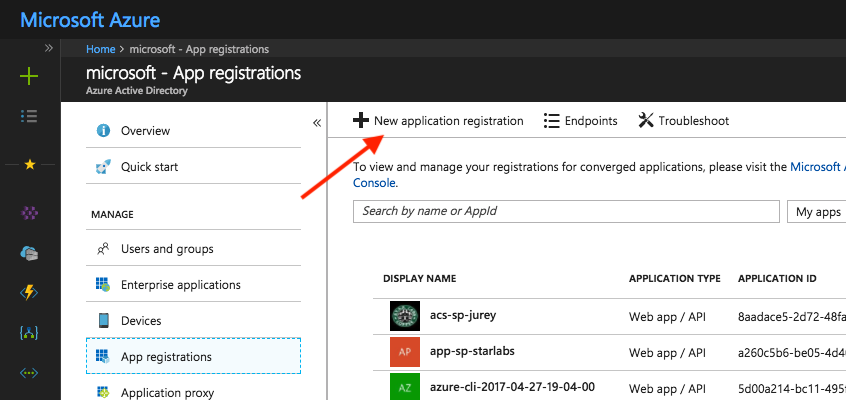
In the Azure Portal access Azure Active Directory -> App registrations and click on New application registration.
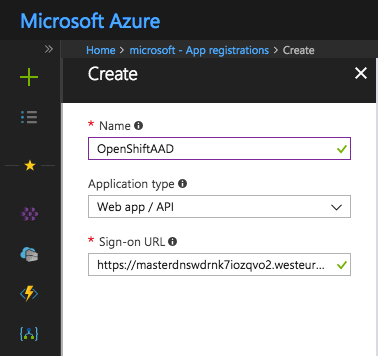
In the create screen enter the name of the app, set the Application type to Web app/API and enter the OpenShift Console URL as the Sign-on URL.
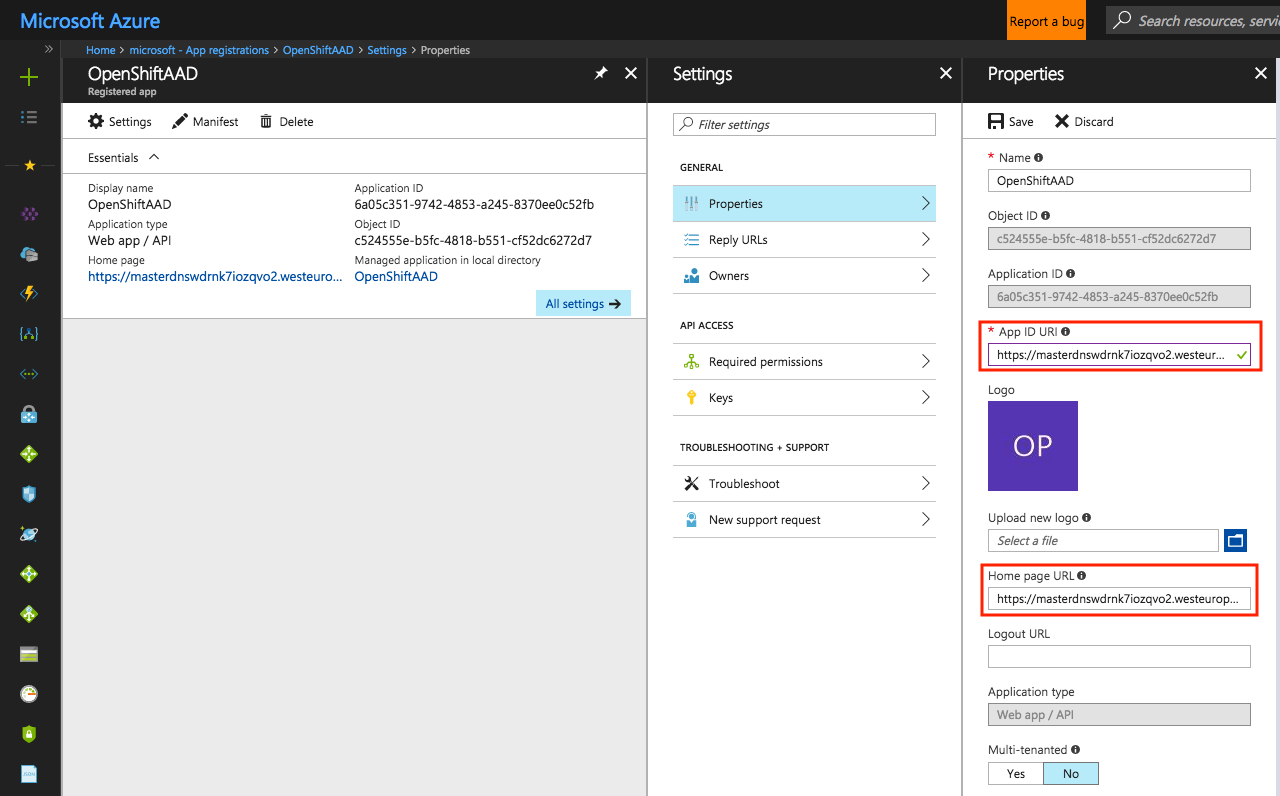
After the new app has been created open its properties and verify that the Home page URL value corresponds with the OpenShift Console URL. In this same page set the same URL as the value for the App ID URI field and save the changes.
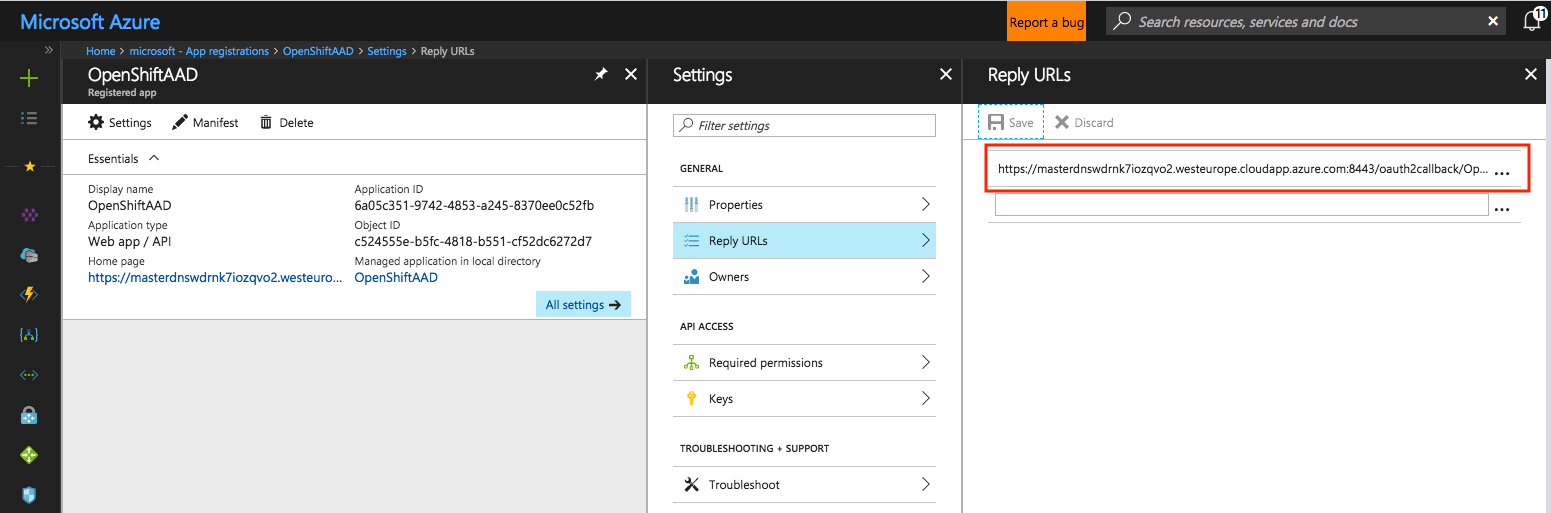
Access the Reply URLs section, delete any existing URL and add a new reply URL with the value of the Reply URL parameter we defined at the beginning.
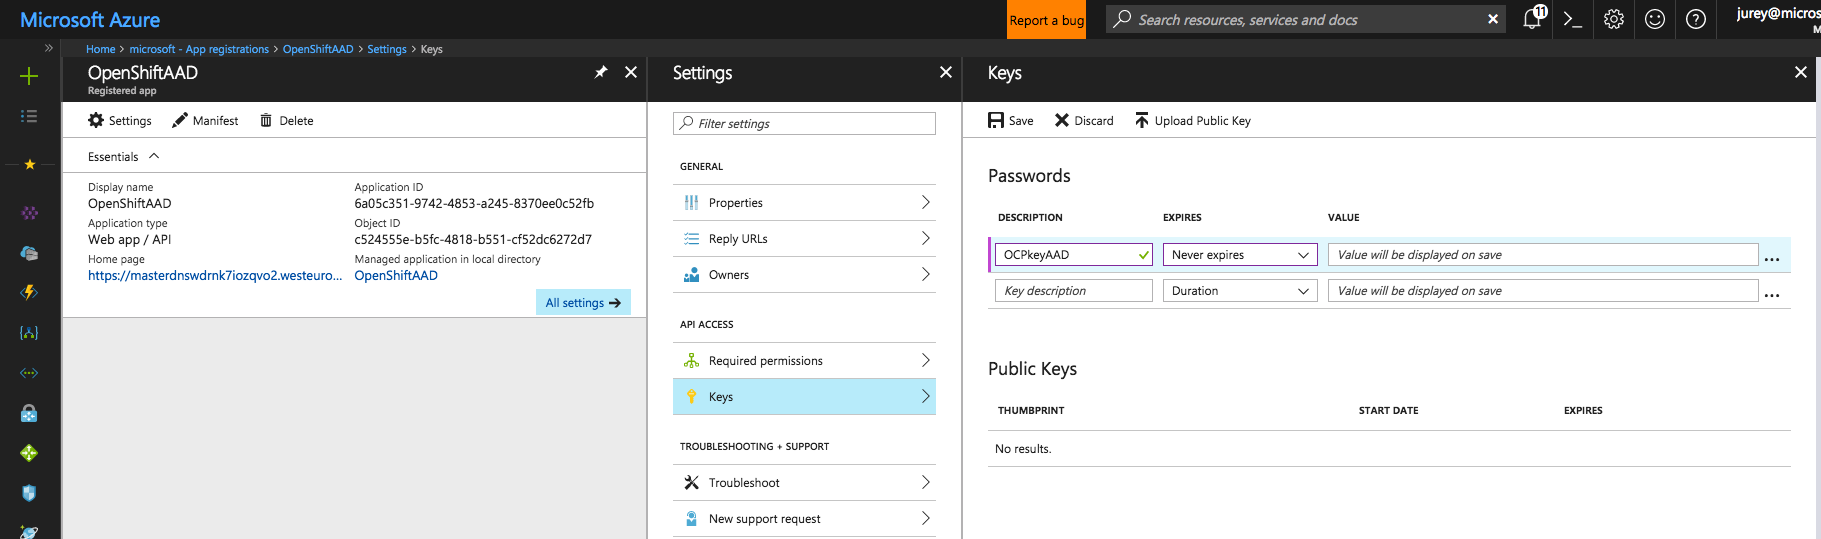
Finally go to Keys. On Passwords enter a description to identify the password, set the duration and click Save. The value of the auto-generated password will be shown on save, take not of it since we will need it later during OpenShift configuration.
App permissions #
Once the app is created, via Azure CLI or the portal, access Azure Active Directory -> App registrations then search for your app and select it. In the Settings blade go to Required Permissions and click Add.
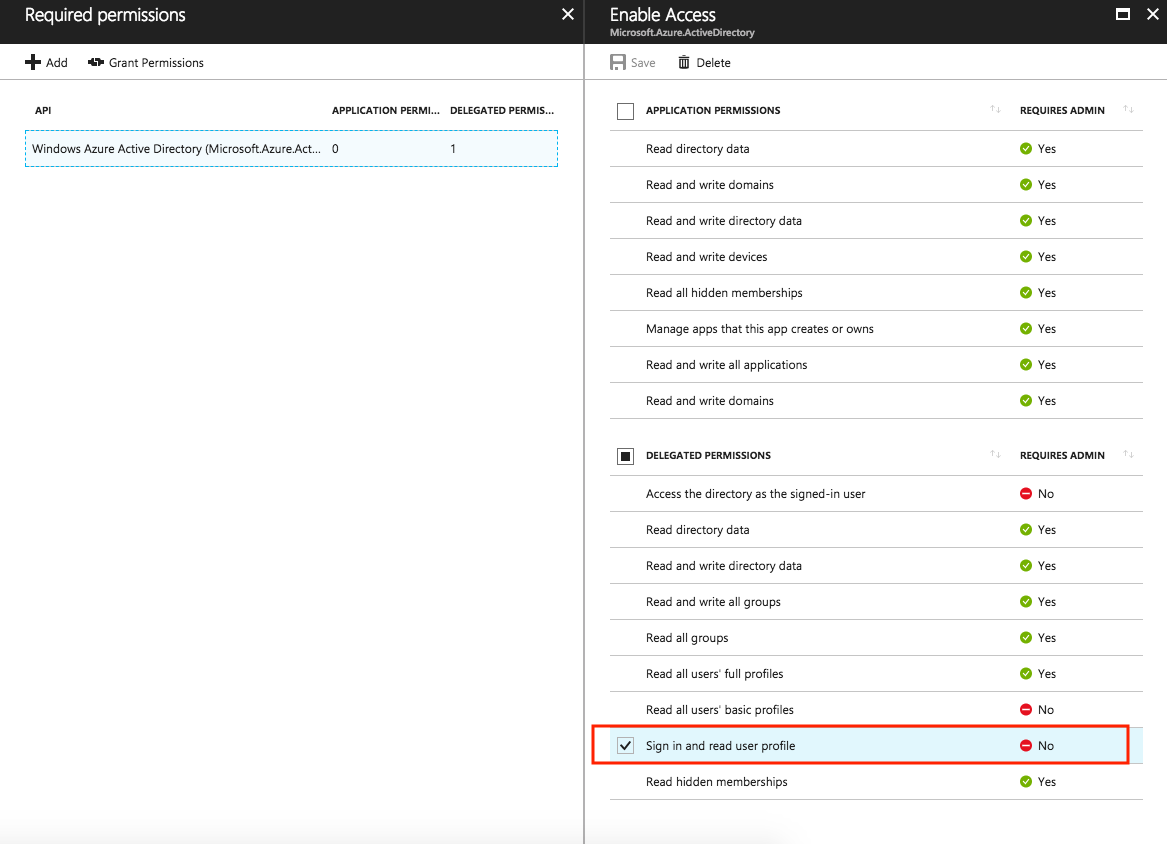
On the first step Select an API look for Windows Azure Active Directory (Microsoft.Azure.ActiveDirectory), select if and then click Select. On the second step Select Permissions select Sign in and read user profile on the Delegated Permissions section and click Select. The final configuration should look like the image below.
OpenShift configuration #
Open an SSH connection to each OpenShift master, make yourself root and edit /etc/origin/master/master-config.yaml. Look for the oauthConfig section, it will contain the following lines, except for the assetPublicURL that will have as value your OpenShift console URL.
oauthConfig:
  assetPublicURL: https://masterdnswdrnk7iozqvo2.westeurope.cloudapp.azure.com:8443/console
  grantConfig:
    method: auto
  identityProviders:
  - challenge: true
    login: true
    mappingMethod: claim
    name: htpasswd_auth
    provider:
      apiVersion: v1
      file: /etc/origin/master/htpasswd
      kind: HTPasswdPasswordIdentityProvider
This section define the authentication configuration of the OpenShift and in order to configure Azure Active Directory as an authentication backed we need to add the following lines to the section. Find your tenant id either in the Azure Portal or with az account show.
- name: <APP_NAME>
    challenge: false
    login: true
    mappingMethod: claim
    provider:
      apiVersion: v1
      kind: OpenIDIdentityProvider
      clientID: <APP_ID>
      clientSecret: <APP_PASSWORD>
      claims:
        id:
        - sub
        preferredUsername:
        - unique_name
        name:
        - name
        email:
        - email
      urls:
        authorize: https://login.microsoftonline.com/<TENANT_ID>/oauth2/authorize
        token: https://login.microsoftonline.com/<TENANT_ID>/oauth2/token
Save the file and restart the OpenShift Master services. This procedure will differ depending if your OpenShift deployment is:
- Multi-master OpenShift Origin
sudo systemctl restart origin-master-api
sudo systemctl restart origin-master-controllers
- Single-master OpenShift Origin
sudo systemctl restart origin-master
- Multi-master OpenShift Container Platform
sudo systemctl restart atomic-openshift-master-api
sudo systemctl restart atomic-openshift-master-controllers
- Single-master OpenShift Container Platform
sudo systemctl restart atomic-openshift-master
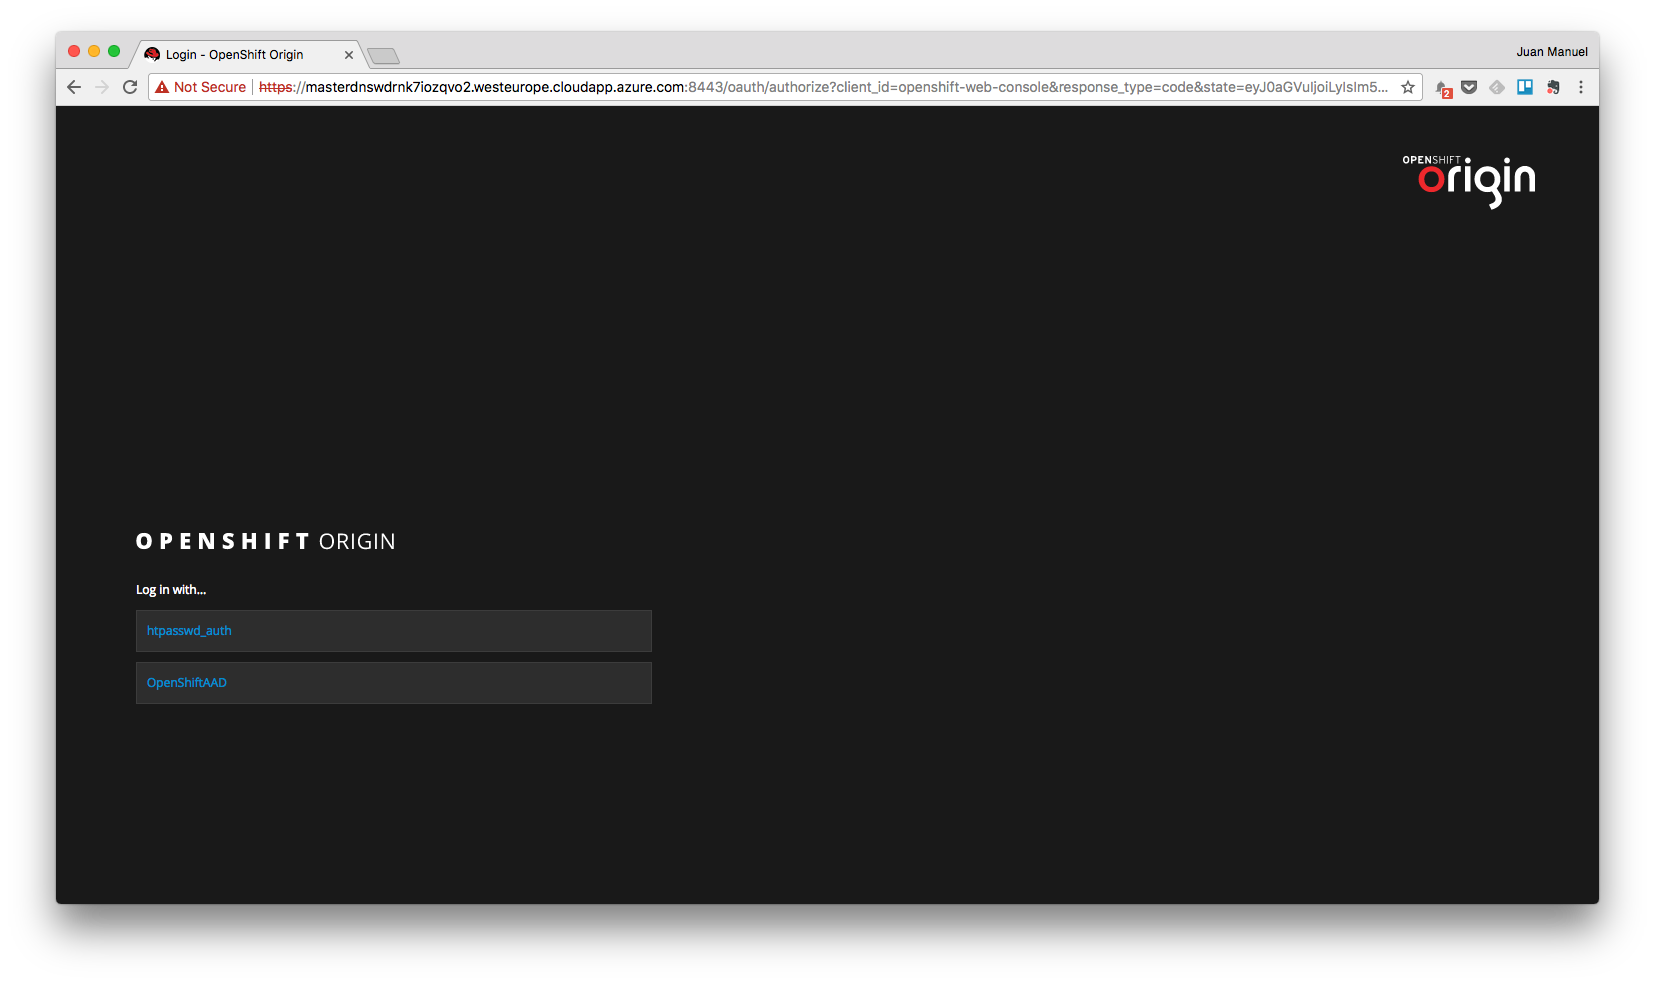
To verify the configuration when the restart operation is finished open a browser and access OpenShift Console. In the login page you will see now two options for authentication, the original htpasswd_auth and a second one with the name of the app.
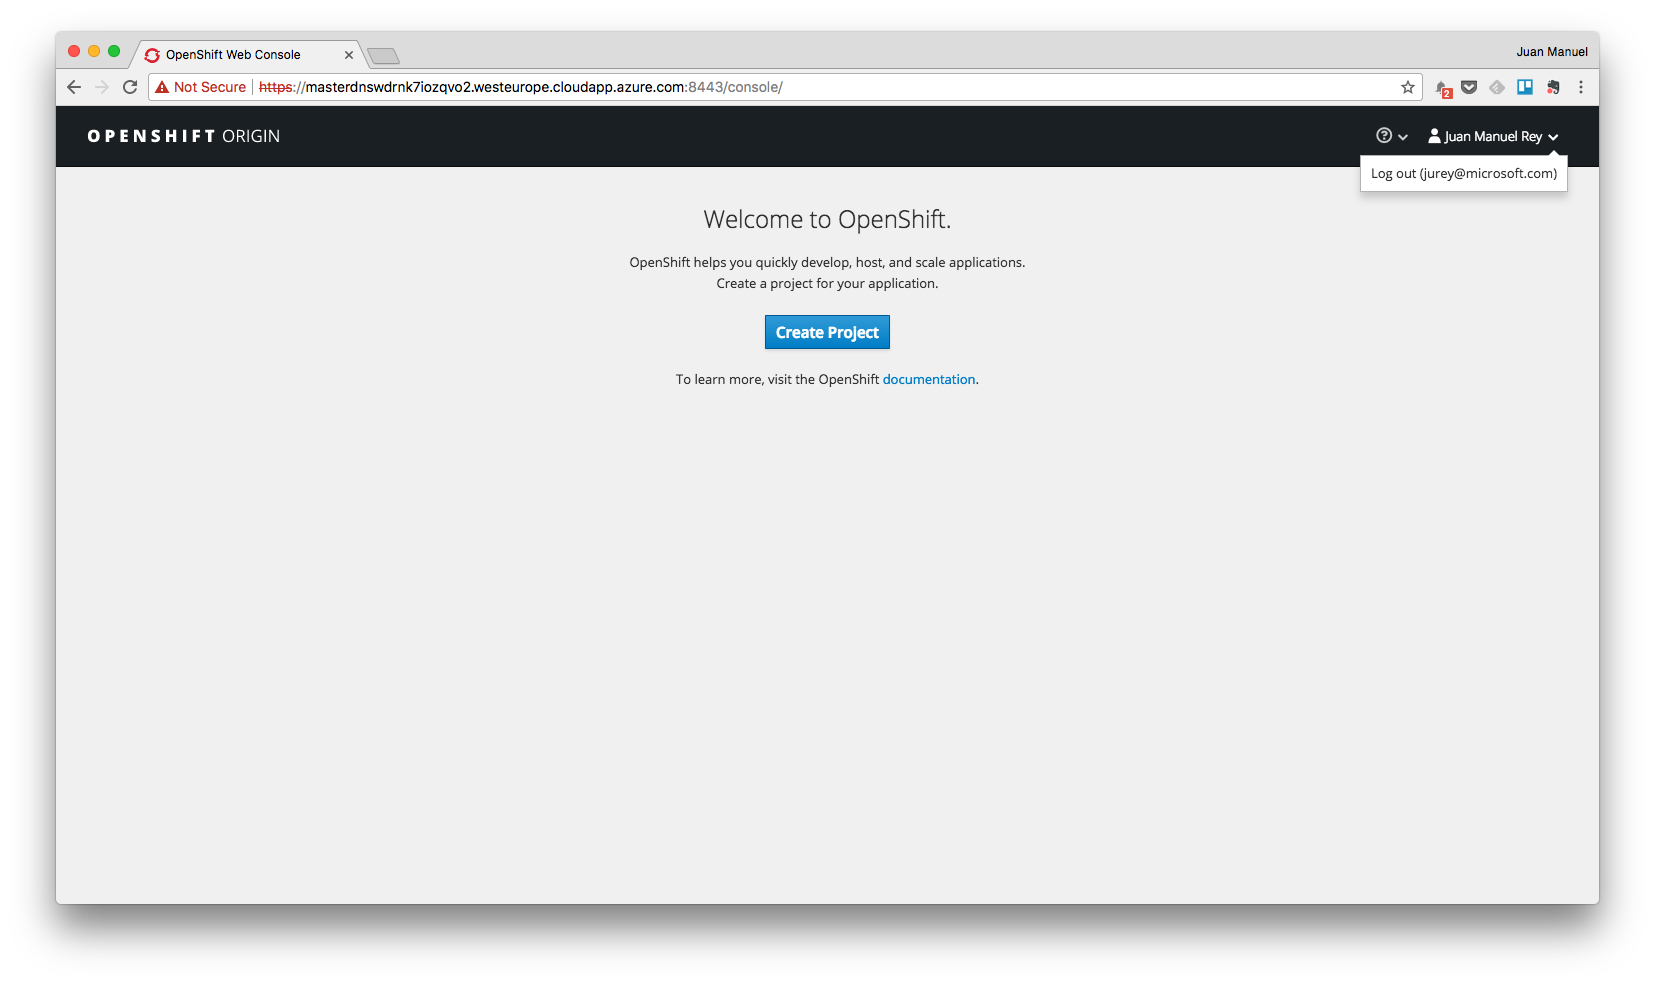
Select the second one and login using your Azure Active Directory credentials. In my case I have used my Microsoft user and you can see me logged into my OpenShift Origin lab on Azure.
Hope this post has been helpful and interesting. Comments are welcome as always.
–Juanma