vCenter Server Appliance. Part 2 - vCenter associated services
Welcome back to this three-part series of articles about the new vCenter Server Appliance. In this second post we will see how the additional vCenter services work in the vCSA and how to configure them.
- Syslog Collector
- ESXi Dump Collector (AKA Netdumper)
- Auto Deploy
Additionally and although is not a service I decided to include a section about how to collect the vm-support scripts in the VCSA.
Syslog Collector
Unlike the vCenter Windows version Syslog Collector comes bundled with the VCSA. As we saw in the previous post it can be configured from the VCSA web interface.
But there are also a limited range of operations that can be done from the command line. Access the vCSA via SSH and make yourself root.
Look if the Syslog Collector is enabled.
Check its status.
Start and stop the Syslog Collector service.
This last option is quite useful since the web interface only allows to stop/start ALL the ESXi Services at once and not individually.
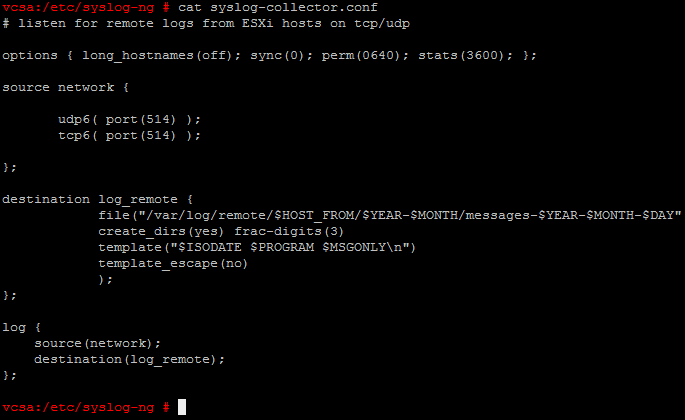
If you want to take a look at the Syslog Collector configuration, the configuration file is located at /etc/syslog-ng/syslog-collector.conf.
ESXi Dump Collector
Like the other services ESXi Dump Collector, also known as netdumper, comes installed with the VCSA and like the Syslog Collector is enabled by default.
It can be configured from the appliance Web UI in the Services tab.
From a root shell you can check the status of the service.
And start/stop the service.
The configuration of the Dump Collector is located at /etc/sysconfig/netdumper.
Take a look at the following variables:
NETDUMPER_DIR- Storage point for the cores.NETDUMPER_DIR_MAX- Amount of space configured for the cores.NETDUMPER_PORT- TCP port of the service, set from the web UI.NETDUMPER_LOG_FILE- Netdumper log file locationNETDUMPER_OPTIONS
From this file you can manually customize all those values, however for the port I prefer to use the web interface.
Auto Deploy
Auto Deploy is the only one of the three services that is not enabled by default. As in the Windows based vCenter version Auto Deploy relies on two services:
- DHCP
- TFTP
In the vCenter Server Appliance those services are included in the SuSE Linux the appliance is based on. However by default those services are 0stopped and are configured to do not start during the system startup process.
These services require of some configuration before they can be used.
DHCP
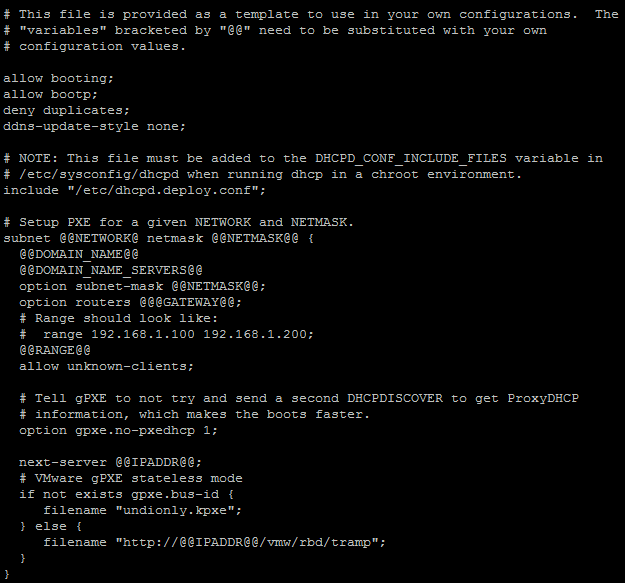
The configuration file for DHCP is /etc/dhcpd.conf but instead of using the default configuration file make a backup of this file and substitute the original with a copy of /etc/dhcpd.conf.template.
Once that is done edit the file, it should look like this.
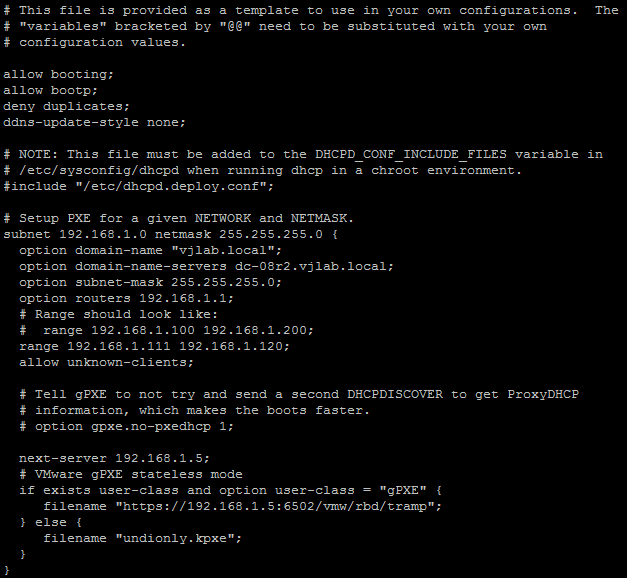
Substitute the values between @@ with the values for your network. You may have to comment some of the lines. My dhcpd.conf file is below as
reference:
Next you have to modify the /etc/sysconfig/dhcpd file. In this file is where the interfaces to listen at for the DHCP server are configured.
Check the DCHP_INTERFACE variable.
If it is empty edit the file and set the value to eth0.
With the configuration done we need to start the service.
And configure the service startup level.
TFTP
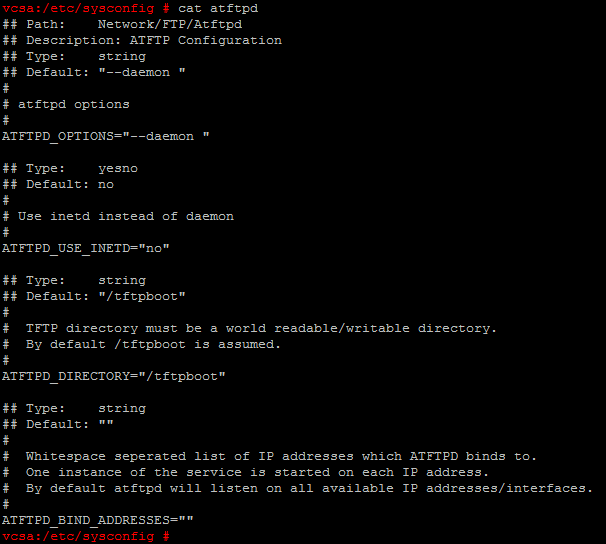
The configuration file for TFTP server is /etc/sysconfig/atftp. There is no need to modify this file since it will work with the default values.
To use a different directory for TFTP server modify the ATFTPD_DIRECTORY variable. If you list the contents of that directory you can see the PXE boot files used during the boot of the ESXi server by the Auto Deploy service.
Start the atftpd daemon.
And set the startup level for the service.
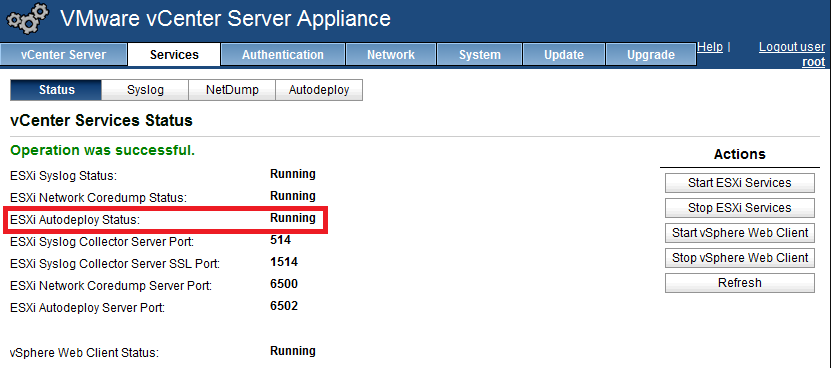
With the DHCP and TFTP service properly configured and running we can now go back to the VCSA web administration interface and start Auto Deploy. To perform the startup of the service simply click on the Start ESXi Services button.
Collecting vm-support scripts
We all know how to generate a support bundle in previous vCenter Server versions and in the 5.0 Windows based one using the vSphere Client or from Windows OS.
For the VCSA the vSphere Client method is completely valid but of course since it is running on SuSE Linux the Windows method doesn’t apply. Instead VMware has provided us with two additional methods, one from the Web administration interface and one from the Linux shell.
Linux shell method
As root go to /usr/lib/vmware-vpx and run the vc-support.sh script. By default this script will generate the bundle in the current directory but you specify an alternate location with the -w flag.
When the operation is done the following message will appear.
Go to the directory where the file has been generated to check it. You can have a quick look of the contents of the bundle using unzip -l.
You can download the bundle to your system using you favorite SCP client.
Web UI method
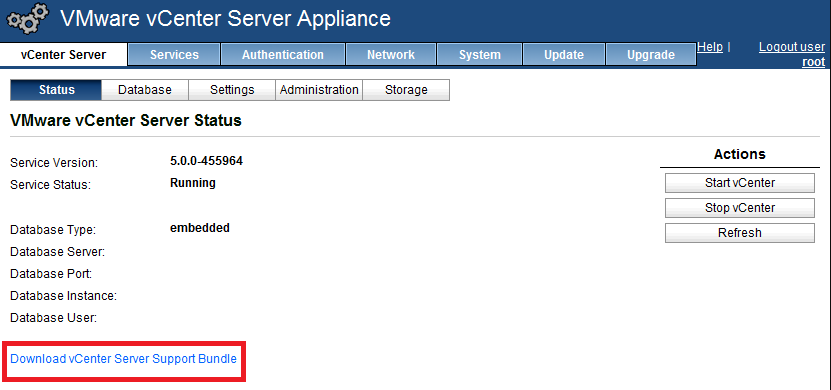
Go the vCenter Server tab and in the Status section there is a link to generate the bundle.
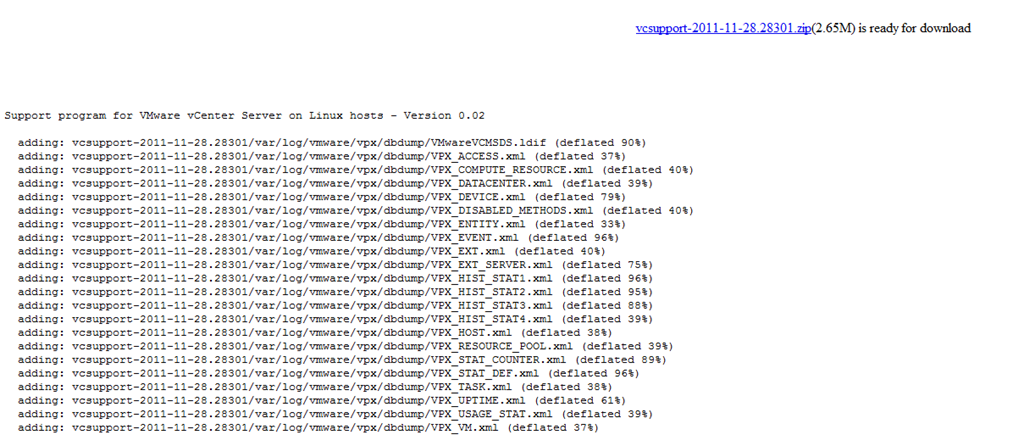
Click on the link, a new tab/windows will show up where the log of the operation is displayed. The page refresh every ten seconds until the operation is done.
Then a link to download the bundle will appear. If you look carefully at the log you will see that this method is no more than a more user friendly version of the Linux shell one.
This file is located at /tmp/vc-support-bundle/<randomly_generated_directory>.
We are done with the vCenter services post. In the next posts I’ll show you how to manage the embedded DB2 database.
Juanma.











Comments