HP Virtual Connect Domain Setup - Part 1: Domain Setup Wizard
A friend asked me last week if I could produce a document for him explaining the initial basic setup of Virtual Connect, I decided that instead of that it would be better and more helpful to write in a series of blog posts, here it is the first of them for you to enjoy.
Virtual Connect is a technology developed by Hewlett-Packard for the HP BladeSystem c-Class enclosures. Provides server-edge and I/O virtualization in order to simplify the setup, maintenance and administration of server connections. It comprises a set of interconnect modules, both Ethernet and Fibre Channel, and a software known as Virtual Connect Manager.
Virtual Connect Manager, or VCM, is the single point administration interface for Virtual Connect. Under the hoods VCM is a software embedded into the VC Ethernet module, it can be accessed through a web-based interface or command line either with a serial connection to the Ethernet module or through a SSH connection to the module.
From the VCM only a single domain, with up to four enclosures, can be managed.
For large-scale infrastructures there is a more scalable version of VCM known as Virtual Connect Enterprise Manager, or VCEM. Unlike VCM, Virtual Connect Enterprise Manager is not embedded into the VC-Enet module, is a separate software that must be installed in another server. VCEM extends the VC management capabilities up to 250 domains and hundreds of blade servers.
Current series of articles will focus only on the Virtual Connect Manager GUI. Please take into account that I’m using Virtual Connect 3.10 version in the whole series and there some differences with the VC 2.x revisions.

When you login into the VCM for the first time a series of wizards will show up to help you with the initial setup of the domain. This article will cover the first of those wizards, the Domain Setup Wizard.
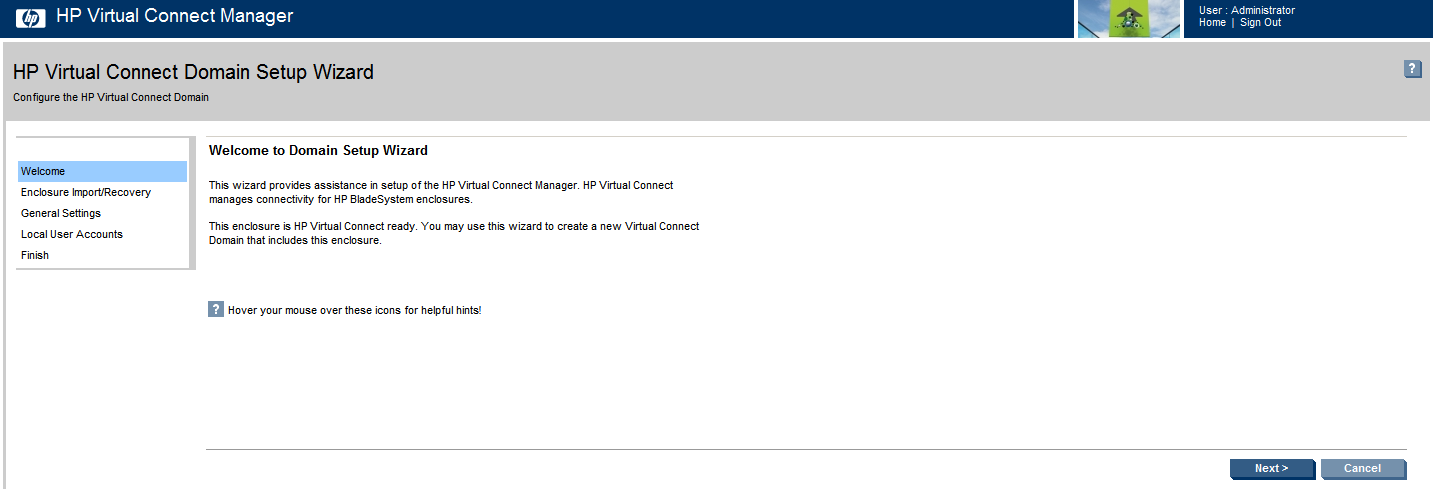
This wizard will allow you to:
- Import enclosure configuration and communication settings
- Name the domain
- Set the IP address of the Virtual Connect Manager
- Set up the local user accounts and its permissions and privileges
- Confirm that the stacking links provide connectivity and redundancy
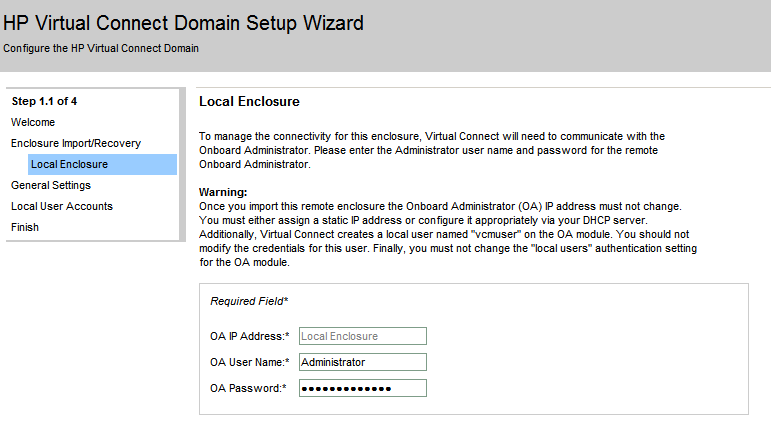
After the informative screen the first step will display. Here you have to provide the enclosure Onboard Administrator IP address and credentials, these credentials must have administrative level. Click next when finish.
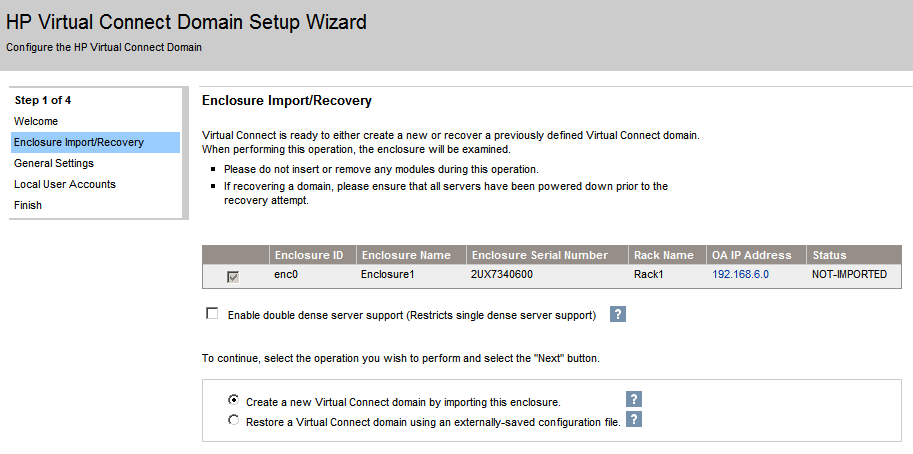
Now VC Domain Wizard will import all the servers and VC interconnect modules within the enclosure.
In the next screen select the enclosure to import and click next.
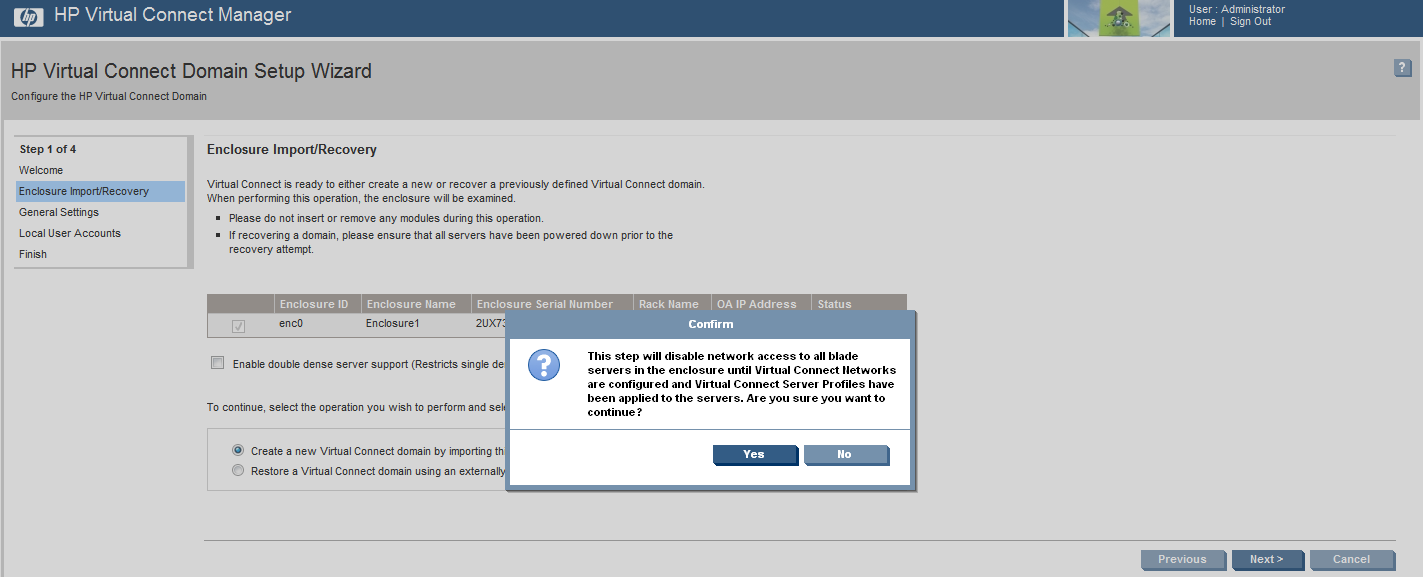
A pop-up will show up to inform that the networking of all the blades within the enclosure will be disabled until VC Networking is properly configured. of course it will ask for confirmation.
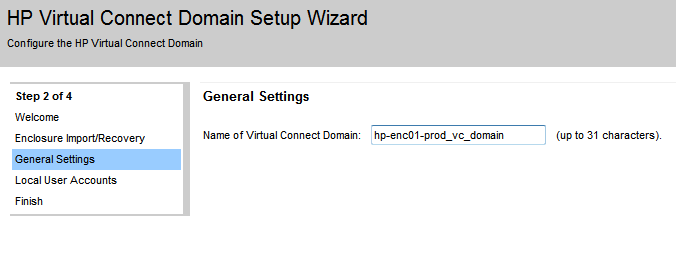
After finishing the import the wizard will go the General Settings part. The Domain Setup Wizard automatically assigns a domain name based on the enclosure name, you can change the name when running the setup wizard or at any time later from the Domain Settings screen. The Virtual Connect domain name should be unique and can be up to 31 characters without spaces or special characters.
Next step is to configure the local user accounts.
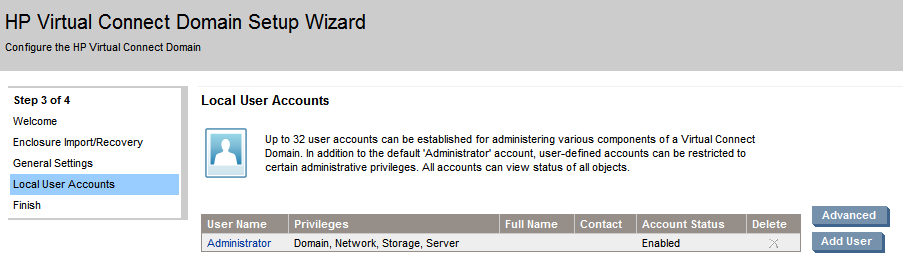
By default the only local account is Administrator, this account cannot be deleted nor have domain privileges removed. You can also add up to 32 accounts with a combination of up to four levels of access. The available levels are:
- Virtual Connect Domain
- Server
- Networking
- Storage
There is also an Advanced area for each account where you can set Strong Passwords requirement and the minimum password length.
With this the Domain Setup Wizard is done. In the next article I will write about the network setup of the enclosure using the Network Setup Wizard.
Juanma